An Adventurer’s Guide to Patagonia
A lot of campers and hikers fall into a rut and continue to visit the same places time and again. And while there’s something to be said for getting to know your favorite park or wilderness area inside and out, the world is a big place and it behooves you to get out and enjoy it.
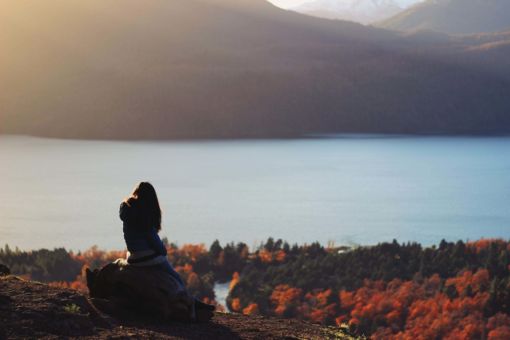
There are a number of fantastic destinations available for hikers and campers who are interested in expanding their horizons, but few are as appealing as Patagonia. Encompassing 400,000 square miles of South America, Patagonia is an outdoor enthusiast’s dream. Home to vast grasslands, arid deserts, temperate rainforests and picturesque glaciers, the region draws hundreds of thousands of visitors every year.
But as with any other exotic location, you must learn all you can about Patagonia before scheduling your trip. We’ll try to help you in this journey below, as we outline the basics geography of the region, detail a few of the most notable parks and wilderness areas and provide tips and tricks for packing and staying safe during your Patagonian adventure.


Getting to Know the Destination: Patagonia at a Glance
It’s easy to see the appeal of Patagonia – it’s one of the most beautiful regions in the world. Typically defined as the area between the Andes Mountains, the Colorado River and the Atlantic Ocean, it stretches as far south as the Tierra del Fuego – an archipelago off the southern coast of South America.
Most of the region (approximately 90%) lies in Argentina, although a few portions of Chile are considered part of Patagonia as well. The entire region is a semi-arid plateau, covered in deserts, pampas and grasslands. A series of dramatic cliffs separate the Patagonia plateau from a thin coastal strip alongside the Atlantic Ocean.
Patagonia is a wide-open area that is primarily comprised of treeless plains. However, there are a few densely forested areas found in the western stretches of the region. Most of these forests are classified as temperate rainforests, and they are home to a unique collection of plants and animals.
In fact, this illustrates a general trend of the region: The farther west you travel, the greater the biological diversity you’ll see. Until that is, you reach the beautiful peaks and mind-blowing glaciers of the Andes, where the biodiversity begins to return to levels similar to those in the east.
Patagonia’s climate is typically cool and dry, with the warmest temperatures occurring in the east. Most of the precipitation falls during the South American winter, from May to August. However, annual rainfall levels generally decrease the farther east you travel, thanks to the rain-shadow effect created by the Andes. Some areas near the Chilean border receive 400 centimeters of rain annually, while rainfall totals in the east are typically in the 30- to 50-centimeter range.

Popular Hiking and Camping Areas
Of course, Patagonia is a big place – it’s about the same size as California and Texas combined. Accordingly, you’ll need to decide on a specific location or two when planning your trip. Fortunately, Patagonia has no shortage of world-class camping destinations from which you can choose.
A few of the most popular trails and parks include:
Los Glaciares National Park
Los Glaciares is one of the most popular destinations for North American and European visitors, and it is located near the shores of Lago Argentino – a huge, beautiful reservoir fed by melting glaciers. Los Glaciares is a remote park, without many signs of civilization, so you’ll need to camp when hiking into the park’s interior. There are plenty of scenic views in the park, but you’ll usually have to hike across rugged trails to enjoy them. And, as you may expect from the name, you’ll have the chance to see plenty of stunning glaciers while visiting Los Glaciares.
Torres del Paine National Park
The most popular destination in the Chilean portion of Patagonia, Torres del Paine is a bit more populated than Los Glaciares. Stores and hotels dot the region and roads provide easy access to many of the scenic points of interest. Torres del Paine is home to the region’s famous W Trek, which stretches for 34 miles and typically takes about four days of hiking to complete. You can see glaciers while visiting Torres del Paine, but you’ll only be able to see them up close via boat.
Reserva Nacional Cerro Castillo
Reserva Nacional Cerro Castillo provides some of the best scenic views in the entire Patagonian region. In fact, travelers who’ve visited the region have one recurring bit of advice: Allow plenty of time to stop and enjoy the beautiful landscapes and take photographs. The park’s roads are in very good condition, which makes traveling between the various scenic wonders quite easy, but you can also hike around the park in about four or five days. There are also shorter trails you can enjoy on foot or via horseback. If you don’t mind a steep and strenuous hike, check out the trail to Lago Carrera, which provides some of the best views around.
Monte León National Park
Located in the province of Santa Cruz on the southeastern coast of Argentina, Monte Leon National Park is primarily comprised of steppe habitat and features plenty of wildlife viewing opportunities – you can even see several different species of penguin while visiting the area. However, the primary attraction of Monte Leon is undoubtedly the beautiful sandstone cliffs and rock formations that characterize the coast. It is important to prepare for chilly weather when visiting Monte Leon, although warm ocean currents do help moderate the area’s temperatures somewhat.
Queulat National Park
Located in southern Chile, Queulat National Park is another popular destination among travelers visiting Patagonia. The Andes dominate the park and serve as the primary geological feature of the region — some portions of the park sit nearly 6,500 feet above sea level. Queulat is quite damp and the region receives enough rainfall to support dense forests on the mountain slopes. The species found in the park often change with increasing altitude, which gives you the chance to enjoy and witness a great deal of biodiversity when visiting the park.
Staying Safe During Your Trip
Fortunately, Patagonia is a relatively safe place for adventurers, and most of the dangers and threats present are similar to those in any other wilderness area. Accordingly, it is important to embrace the same basic safety practices you’d employ when traveling anywhere else.
Among other things, this means:
- Travel in groups. Vast tracts of Patagonia are uninhabited or nearly so, and several of the trails pass through very remote lands. The best way to stay safe in such isolated areas is by traveling with several companions.
- Let someone know when your trip is scheduled to conclude. Just like if you were camping in a stateside park or forest, you’ll want to be sure a friend or family member is anticipating your return. This way, he or she can alert authorities if you fail to contact them at the predetermined time.
- Watch out for big cats. Although there aren’t many big predators in Patagonia, pumas are occasionally spotted lurking near the trails. The best way to stay safe around these big cats is by remaining alert and traveling with others. Pumas typically want to surprise their prey and they aren’t keen on attacking animals traveling in packs.
- Sterilize water before you drink it. Although some of the glacial streams in the western reaches of Patagonia are reportedly safe to drink, it is always better to be safe than sorry. Additionally, the water at many of the more popular parks and campsites becomes polluted from the activities of other campers.
- Bring a fully stocked first aid kit and know how to use it. Because of the remote nature of Patagonia’s parks and trails, you’ll have to tend to any wounds on the trail.

Packing and Preparing for Your Trip
Proper preparation is important for any trip, and your Patagonian adventure is no different. You’ll want to start with the same basic packing list you use for any journey, but there are a few extra items you’ll want to pack when heading to southern Chile and Argentina, and you may need to make a few adjustments to your gear.
Some of the most important and noteworthy changes you may want to make include:
- Rugged, waterproof hiking boots are imperative. You’ll always want high-quality hiking boots when planning to trek for several days, but given the muddy, wet and rock-strewn trails common to most Patagonian parks, they’re more important than usual.
- Your tent must be capable of withstanding strong winds. Patagonia is a very windy region, which will ruin the shape and rip the seams of flimsy tents. Be sure the model you select has robust tie-downs and orient the tent so that one of the poles faces directly into the prevailing winds.
- Prepare for the sunshine. Although Patagonia is relatively cool, some portions of the area are bathed in very strong sunlight – particularly near the glaciers, where the light reflects off the white ice in all directions. Bring plenty of sunscreen to protect your skin and a pair of sunglasses to keep your eyes safe.
- Make sure you bring a camp stove. Open fires are prohibited in many of the region’s parks, so you’ll need to use a camp stove, rather than a campfire to cook your food. Don’t forget to bring plenty of fuel, as many of the hikes you’ll take through Patagonia will take several days to complete.
- Prepare for mosquitos. Patagonia may be a bit cool, dry and windy, but the mosquito population can explode anytime rainy weather happens in the summer. Consider repellant mandatory and consider bringing along a mosquito net for even more protection.
- Layers are your friend Patagonia can experience 60-degree temperature swings over the course of a single day, so you’ll want to be able to adjust your clothing as the weather changes. Wear lightweight, moisture-wicking materials close to your body, use heavier insulating garments for your mid-layer and top everything off with wind- and water-resistant garments.
- Trekking poles are invaluable in such rugged terrain. Patagonia will challenge even the most physically fit hikers, and the miles of rugged trails and rocky escarpments can make it difficult to keep your balance and take a toll on your joints. But, a good pair of trekking poles will help you stay upright and relieve some of the stress on your knees.

Logistical Considerations and General Traveling Tips
Unlike scheduling a camping trip for the national park that may only be a couple of hours up the highway from your home, you’ll need to travel thousands of miles to reach Patagonia. Such journeys entail serious logistical challenges, so it is important to plan and prepare carefully.
Some of the best ways to ensure your trip goes smoothly include:
- Get your paperwork in order. You’ll need a valid US passport to enter Argentina or Chile (you’ll also need it to exchange American currency for Argentine or Chilean pesos. However, you will not need a visa as long as your trip won’t last longer than 90 days.
- It is usually wisest to travel during the South American spring, Summer or fall, as you’ll have better access to hotels and retail outlets. Many are only open seasonally and close during the off-season. You’ll face fewer crowds during the spring or fall, but you’ll enjoy the warmest temperatures during the summer.
- Check to see if you need to obtain permits or book a campsite at the parks you intend to visit. Many of Patagonia’s parks and wilderness areas require visitors to book a campsite in advance or purchase a permit to enter the park. Torres del Paine, for example, charges campers $38 to enter the park.
- Plan for inclement weather. Strong thunderstorms are common during the spring and early summer, so it is wise to build a couple of extra days into your schedule to make up for days lost to rain.
- Purchase your airplane tickets several months in advance. Unless you are planning a month-long visit, you’ll want to fly directly into Patagonia – it’ll simply take too long to get there by car. Flights fill up quickly during the peak travel season, so you’ll want to secure yours early.
- Fly into one of the most convenient locations. To maximize your time spent on the trail, try to fly into one of the closest cities you can. A few of the best choices include Calafate or Ushuaia if you are headed to the Argentinian side of Patagonia; for those heading to the Chilean portion of Patagonia, Puerto Natales or Punta Arenas are good choices.
- Plan your overland travels in advance. There are a number of ways to explore Patagonia and travel between the different cities in the region, but bus and chartered car services are two of the best options. However, bus tickets go quickly and charter services book weeks in advance, so don’t wait until you get there to make arrangements.
- Save money by eating at your hotel. Many of the local hotels provide meals as part of the standard nightly rate, and most of the nicer motels in the region count world-class chefs among their staff. This means you’ll have the chance to sample local specialties, many of which were grown or raised within a few miles of the hotel.
- Do not plan on purchasing gear in Argentina. Argentinian sporting goods stores and camping supply stores are notoriously over-priced, as they try to capitalize on tourists in need of gear. Chile’s retail outlets are also quite pricey, though not to the extent that Argentina’s stores are. In either case, be sure to bring along everything you’ll need. This can make travel more challenging, but you’ll be glad you brought all your gear when you see the exorbitant prices attached to even the most basic camping items.
- Be sure to check the CDC’s list of recommended vaccines before traveling. Currently, the CDC recommends that travelers heading to Argentina or Chile be sure that they are up-to-date on all routine vaccinations (measles, mumps, etc.) and that they obtain vaccines for typhoid and hepatitis A. Additionally, some travelers are also encouraged to obtain vaccinations against rabies, hepatitis B and yellow fever.

Patagonia is certainly one of the most remarkable locations in the world, and any hiker or camper who gets the chance to visit should consider themselves lucky. But, to ensure that you make the most of your trip and have the best time possible, you must prepare for the trip carefully.
To that end, be sure to embrace the tips, tricks and suggestions explained above and read everything you can about Patagonia. It is also wise to speak with anyone you know (or can contact) who has visited the region, as first-hand accounts and experiences are often quite helpful when trying to understand a foreign land.
Once you’ve completed your homework and formulated a complete travel plan, take a deep breath and relax. It’s time to start getting excited and mentally prepare yourself to make the most of your journey. As with any other trip, you’ll surely experience a few minor challenges, but that’s part of the reason adventures are so much fun.
The post Patagonia Trekking & Hiking: Everything you Need to Know appeared first on Montem Outdoor Gear.
from
https://montemlife.com/patagonia-trekking-hiking/


